Monday, October 15, 2012

Pepperoncini Beef Sandwiches


I found this recipe over at Crockpot365, and Stephanie really nailed it with this one. Oh.my.goodness.

If you are looking for a seriously flavorful and ridiculously easy entree to bring to a tailgate, pot luck, or just to eat with your family, look no further!

This recipe is one of my favorites for both of those reasons. It is bursting with flavor and requires all of 2 ingredients. YES! It really doesn't get much easier.

It is a great OAMC candidate because it's so simple. One of those that you toss into the bag and forget about until you decide to cook it. 

And when you DO choose to make it, be prepared for some tantalizing, aromatic smells coming from your crockpot. If you're like me, it will take a considerable amount of self-control to wait the full 8 hours to dig in to this one. :)


Pepperoncini Beef Sandwiches

Ingredients:
2-2.5 lb chuck roast
1 (12-16 oz.) jar banana pepper or pepperoncini rings

For Today:
1. Trim fat off of roast. Place roast in crockpot. Pour contents of jar over the roast. Cook on low 8 hours. (You probably could cook it on high for about half the time, but for tender, juicy, fall-apart meat, slow and low is the winning combination)
2. Shred meat with two forks. Serve over crusty Italian bread, top with your choice of white cheese (mozzarella, provolone, swiss, pepper jack, whatever you like!... but only if you want to...)
*I like to pour a little of the flavorful juice over the meat too. Some people don't like soggy sandwiches and I totally get that, but if you want extra flavor, give it a try!
**Also, to melt the cheese and make the bread extra crispy, you can broil it in the oven  for a minute or two. 

For the Freezer:
1. Trim fat off of roast and place in gallon-size freezer bag. Pour contents of jar over roast, seal bag and place in freezer.
2. Place frozen contents of bag in crockpot. Cook on low 8-10 hours. Shred with 2 forks and serve as called for above.

So easy and SO good! I love it! It may be that I've been on a banana pepper kick lately, but still... Try it, it'll be worth it!

Thursday, October 11, 2012

Cheesy Chicken and Rotini


Cheesy Chicken and Rotini Casserole
Soo... this picture is courtesy of BettyCrocker.com. If you haven't noticed yet, I'm not super great with a camera. I'm hoping I'll get better... we'll see. :)

If you feel the need to break up the OAMC rotation with some non-crockpot meals, this little recipe  just might come in handy. It comes together quickly with a frozen mix of veggies and precooked chicken. This casserole is nice and light, the perfect Summertime pasta dish... I realize Summer is officially over, I'm just trying to appropriately convey the level of richness of this meal. :) So yes, it is a pasta, but it's not one of those where you feel like you might need to loosen your belt after eating it.

The flavor is fresh! Especially with those delicious Roma tomato wedges on top.

Quick, light and fresh - I know I'm not the only person who finds those qualities attractive! 

Here goes:

Cheesy Chicken and Rotini

Ingredients:
8 oz cooked rotini pasta
2 cups cooked chicken
1 cup frozen onions, celery, bell pepper and parsley seasoning blend. (I have a hard time finding this sometimes. The brand is Pictsweet, but not everybody carries it... so you may substitute it with another veggie/seasoning blend. I think I've tried it with a gumbo mix and it worked out pretty well!)
1 can cream of chicken soup
1 cup chicken broth
2 Roma tomatoes cut into 6 wedges each
3 green onions, sliced
1/2 cup cheddar cheese

For Today:
1. Preheat oven to 350. Combine first 5 ingredients in 8x8 baking dish. Bake uncovered for 35-40 minutes or until bubbly.
2. Remove from oven, top with tomatoes, onions and cheese and return to oven for a few minutes, just until the cheese is melty.

For the Freezer:
1. Combine first 5 ingredients in 8x8 foil pan. Cover with a double layer of tinfoil and place in freezer.
*As for the remaining ingredients, usually I'll put the cheese in a small bag and duct tape it to the top of the pan, just so I know I have it on hand when I decide to make this dish. However, I've never tried freezing the green onions or tomatoes, so I can't recommend it. You may just need to have a note on your recipe list to have those items handy when you want to use this particular freezer meal. It may seem like a hassle, but the tomatoes really make this dish...
2. Allow the casserole to thaw in your fridge overnight, or on the counter for a few hours. The cooking time and temperature should be the same as above - 350 degrees for 35-40 minutes, then add the tomatoes, onions and cheese and return to the oven for a few more minutes.

I like to serve it with my go-to Italian bread recipe... YUM!

Wednesday, October 10, 2012

October Cook

I really enjoy cooking with friends, so we've got a pretty good little group going... BUT... we all go through our meals at different rates. 16 meals lasts my family about a month, but it tends to last my cooking buddies 2 months. So we cook as a group every other month and I do a little cook on my own in between.

With company coming to town right as my freezer meals ran out, I didn't have much time to put into planning for my individual cook, so I reverted to a lot of family favorites and just doubled up on several of them. They almost all ended up being crockpot meals, which stinks when it comes to washing your crockpot every other day, but really awesome in regards to the cooking day - you really just throw everything into their bags and then you're finished!

So here's my list of recipes:

Cheesy Potato Soup
Salsa, Chicken and Black Bean Soup
Red Beans and Rice (2)
Chicken Chili
Creamy Chicken and Broccoli (2)
Pepperoncini Beef Sandwiches
Crockpot Ravioli Casserole (2)
Lazy BBQ Chicken (2)
BBQ Pulled Pork
Honey Garlic Chicken
World's Best Chicken (2)


If you can't tell, I'm pretty excited about the change of seasons and the addition of soups and chili to my recipe list! Yay for Fall!

So, with not a lot of time to prepare myself for this cook, I literally threw together my recipe and ingredient lists within an hour and headed out to the grocery store with my 6-month-old in tow. I wouldn't normally recommend doing that, but it really wasn't so bad.

Also being rushed to do my monthly cooking, I hadn't put a day aside to do it all, so I broke it up a little bit. I planned and shopped on Tuesday afternoon/evening. Wednesday morning, with the 2 year old eating his cereal in the high chair, and the baby taking a little morning nap, I labeled all of my bags then cut up all the chicken and sorted it into the appropriate places. At that time I also poured the BBQ sauce in with the lazy chicken recipes and threw those in the freezer. That was all I had time for.

I picked up from there at nap time. I cooked the ground beef for ravioli casserole and chopped the sausage for red beans and rice. I assembled those and threw them in the freezer. Then worked on the Pepperoncini Beef Sandwiches and BBQ Pulled Pork. Sliced off fat, added one or two ingredients to each of those, then put them in the freezer. (This part really moved quickly! I LOVE crockpot freezer meals!!)

From there I worked on some of the chicken meals, doing what I could before the baby woke up. I managed to get Honey Garlic Chicken and World's Best Chicken put together and in the freezer, leaving just 4 more recipes to throw together the next morning.

That is a busy mom's poorly planned variation of OAMC.

AND just to sweeten this post a little bit AND to celebrate Fall, I'd like to throw in a souper (haha - lame, I know, but I couldn't resist...) recipe!

Salsa, Chicken and Black Bean Soup

Now I hope you didn't just get disappointed. I tried this recipe on a whim. Normally I don't think it's something I'd be interested in... at all, but I knew my husband loved black bean soup from his teenage years working in a Mexican/Cuban restaurant, and the rest of the ingredients sounded pretty good, AND it looked way easy... so naturally, I decided to try it out. And it was delicious!

Salsa, Chicken and Black Bean Soup

Ingredients:
1 lb boneless/skinless chicken breast
1 cup dry black beans (or 2 15 oz cans, rinsed and drained)
4 cups chicken broth
1 cup frozen corn
1 16 oz jar prepared salsa
1 1/2 tsp cumin
1/2 cup sour cream
shredded cheese, avocado slices, etc...

To Prepare Today:
*If you are using dry black beans, you'll need to soak them overnight in enough water to cover them plus 2 more inches.
1. Drain and rinse the black beans and place them in the crockpot. Add chicken, chicken broth, salsa, corn and cumin. Stir ingredients without moving the beans - they need to stay where it's hottest. Cook on low 6-8 hours or on high 4-5 hours. If you want it to be thicker, use an immersible blender to mash up some of those beans (or be like me and just mash them with a spoon!).
2. Mix in sour cream before serving. Garnish with desired ingredients.

To Freeze:
*Use canned black beans, rinsed and drained.
1. Place first 7 ingredients in a gallon-sized freezer bag. Freeze.
2. Empty bag into crockpot. Cook on low 8 hours or on high 5 hours. Mash beans for a thicker broth. Stir in sour cream before serving. Garnish as desired!

Monday, October 8, 2012

Creamy Chicken and Broccoli

Ok, so in our cooking group all of us have our favorite OAMC meals, and while mine switches up every now and then, it is usually Creamy Chicken and Broccoli.


Cheesy and delicious... This dish seriously has "comfort food" written alllllll over it! 


This recipe was a fabulous Pinterest find that I just HAD to try! And when it turned out to be delicious... I decided to give it a go as a freezer meal. And it worked! You seriously wouldn't even know it was frozen.

In fact, I made it for a friend and her family this past week and they LOVED it! So much so that she even asked for the recipe (that's the real test - whether or not they ask for the recipe...). YES! Little did they know that that particular meal had been in my freezer for just about a month. Hooray for freezer meals!

With no more ado, here's this wonderful little recipe -

Creamy Chicken and Broccoli

3-4 boneless/skinless chicken breasts
10 3/4 oz. can cream of chicken soup
10 3/4 oz. can cheddar cheese soup
14 oz. can chicken broth
1/2 tsp. salt
1/4 tsp. Cajun seasoning (such as Tony Chachere's)
1/4 tsp. garlic salt
6 cups frozen broccoli (florets or cuts, it's up to you!)
1 cup sour cream
1 cup shredded cheddar cheese

For Today: 
1. place chicken breasts in the crockpot. Combine soups and broth and pour over chicken. Sprinkle with seasonings and cook on low 6 hours, or on high 3 hours.

2. With 30 minutes left in cooking time, use 2 forks to shred the chicken breasts. Stir in the broccoli and sour cream. Serve over steamed rice and sprinkle with cheese.

For the Freezer:
1. Place chicken breasts in gallon-size freezer bag. Pour in soups and broth. Sprinkle on seasonings. Measure 1 cup of shredded cheese into a quart-size freezer bag. Use duct tape, or some other means to hold the cheese and broccoli to the main bag. (see picture!)

2. Place frozen contents or main bag into crockpot. Cook on low 6-8 hours, high for 3-5 hours. With 30 minutes left, shred the chicken and add sour cream and broccoli. Serve over steamed rice and sprinkle with cheese.


Saturday, October 6, 2012

The Second P.

Prep Work.

This "P" always turns out to be more involved and more time consuming than I anticipate. This is where I REALLY get my cooking game plan all figured out.

At some point after getting home from shopping and putting all of the cold stuff away, I pull out my little list of recipes and write a different list. This time I'm going through and looking at which recipes call for cooked chicken, chicken pieces, full chicken breasts, cooked ground beef, sliced beef, raw beef, chopped veggies, you get the idea... Basically, making a list of everything that needs to be done before I can start assembling the meals.

Cooked chicken is usually where I start. I throw as much of it as possible into the crockpot and let it do it's thing on high for 4 hours. [You can boil yours if you prefer, I just love my crockpot, as I'm pretty sure I've mentioned before... ;)] Then I shred it, put it in some sort of container, throw a sticky label on it, letting me know which recipe it's intended for, and put it in the fridge. Then, if needed, I'll get another batch of chicken going.

After throwing the initial batch of chicken in, I'll print out my handy dandy labels and slap on the ones that will be used with recipes that are stored in freezer bags. The labels that are for casseroles, or other recipes that are prepared in foil pans won't go on until after the fact.


Since I'm working with the chicken already, I'll work on slicing off the fat, cutting it up for various recipes and portioning it out, putting the right amounts in their various bags. Sometimes this prep work only requires cutting the fat off of a chicken breast and putting it in its appropriate bag, sometimes I have to do a bit more cutting, depending on the recipe, but it's not too bad.

All of the chicken recipes, after cutting it up and portioning into the appropriate bags
*Note: This was for a cook that I was doing just for my own family. I didn't use labels this time, so disregard the sloppy handwriting
I usually cut the BBQ chicken into similar portion-sized pieces so they'll all cook at about the same rate.
This is an example of a recipe where I simply cut off the fat and set the chicken into it's bag.


*I almost always have a little bit of chicken left over. I buy the 5-6 lb packages that you find at Sam's or Wal Mart and I tend to overestimate - better safe than sorry, right? Anyway, when I do have leftovers, I portion it out into 1 lb increments, dice it up and wrap it in tinfoil. I write "Chicken" and the date on it and put it in the freezer... and voila! Pair that with a box of Velveeta Cheesy Skillets (or chicken helper, or a stir fry, etc...) and you've got another freezer meal! Yes!!

Once the chicken is done, I'll clean up and move on to the next meat. I'll cook what needs to be cooked and then label it and put it in the fridge to use when I'm ready to assemble the rest of the meal. 

For the meats that don't need to be cooked, I'll slice off fat, cut it up as the recipes call for, and place them in their bags, just as I did with the chicken.

Once all the meats are done I move on to vegetables. Usually this doesn't take too long. I tend to buy the frozen, chopped veggies to save myself time. Who really wants to bawl their eyes out cutting up onions? Not me... so I buy LOTS of frozen, chopped onions. The bags cost $1 at Kroger and I think that's totally a worthwhile investment. I also buy frozen, chopped celery if I can, and sliced peppers and onions for crockpot fajitas, etc...

Occasionally I'll have potatoes to cut up, but I try to keep them to a minimum - potatoes don't freeze particularly well. FYI

Once all of that is done, if you still have any energy left, you may want to organize your plethora of ingredients into little piles based on the recipe you'll be using them for. This isn't really necessary, but if you can't handle the huge pile of dry goods hanging out in your kitchen, it may ease your mind to have some sense of order. :)

And one final note - if you are cooking as a group, you'll probably want to divide recipes evenly and have things set up in little stations for each group member. That tends to make things run a bit more smoothly, with less confusion and people bumping into each other as you put everything together.

OK.... So, this P was pretty involved, but basically you're:

1. Cutting, cooking and portioning out the meats as needed for recipes.

2. Applying labels and organizing freezer bags and meats for quick use the next day.

3. Cutting up vegetables, if needed.

4. Organizing the various other ingredients as needed.


[Doesn't sound too complicated when you look at it like that, eh? ;)]

Thursday, September 27, 2012

Pesto Chicken Penne


Check out that delicious, crispy spinach! Throw in some cheese, tomatoes and a creamy alfredo-pesto sauce, and I'm SURE you'll find some excuse to make this sometime soon. :)

You know what I said about overlapping ingredients? Well, I really like to do that. So every time I decide to do a cook that involves Spinach Pesto Manicotti, it has to include Pesto Chicken Penne as well - they both use about half of a 7.5 oz bottle of pesto, so that keeps things much easier for me. I know that I'll need 1 full bottle of pesto, rather than storing a half-used bottle in my fridge and waiting for another opportunity to use it. 

The original recipe comes from here, but the proportions are ALL KINDS of crazy. So I have made a lot of modifications and have finally tweaked it into a recipe that our family enjoys. It's one of those recipes that sneaks in some vegetables - YES!! :) Yummy spinach...

Pesto Chicken Penne
Ingredients:
1/4 cup bread crumbs
1/4 cup parmesan cheese
1 TBSP Olive Oil
8 oz cooked penne pasta
3 cups cooked chicken (I always use shredded)
2 cups Italian blend cheese
2 cups baby spinach leaves
15 oz can diced tomatoes
4 oz prepared pesto sauce
7.5 oz prepared alfredo sauce
3/4 cup milk

  1.  Combine bread crumbs, parmesan cheese and olive oil in a small bowl, just until moistened. Set aside.
  2. Prepare pasta according to package directions. Drain Well.
  3. Combine chicken, Italian cheese blend, spinach, tomatoes, pesto sauce, alfredo sauce and milk in a bowl. Add pasta, when done, and spoon mixture into baking pan. Top with bread crumb/parmesan cheese mixture.


To prepare immediately: Bake at 350 for 40-45 minutes.

To freeze: use foil pan, and double wrap the top with tinfoil. Place in freezer. When you decide to cook it, allow PLENTY of time to thaw. I recommend putting it in your fridge the night before, then moving it to your kitchen counter a few hours before you plan to bake it, just to be sure it's not a solid brick of food. Baking times will still vary. Bake at 350 for at least 45 minutes, it may take a bit longer, though.

Tuesday, September 25, 2012

Rocky Road Cookies

Ok, ok... I know my blog is supposed to be about once a month cooking, but as much as I love my crockpot and the ease of freezing all of our meals... baking is still my favorite thing to do in the kitcen. :) 

I have the biggest sweet tooth of anyone that I know and I've been able to deal with that by baking fabulous desserts... for myself! hahaha yes, I probably should weigh 300 lbs, but for some magical reason I don't. Yet. Maybe in a few years... 

Anyway, I have recently become a licensed real estate agent. What does that have to do with baking, you ask? Well... I've decided to incorporate my love for sweets with my new career path. What?! So, in my ambitious efforts to find leads and get my first listings I decided to bake cookies for prospective clients. My DH and I searched for the perfect recipients (8 households, to be exact), then I baked the cookies, made them look cute and set off on my adventure.

Now the cookie recipe I chose had to be amazing - I'm trying to persuade people to entrust the biggest asset that they own to my care. And THIS recipe is the one that I chose. Just look at them... 


Mmmm... those gooey, melty marshmallows. That crispy, chocolatey outside paired with the warm and rich center. Yes, these may throw others into a diabetic coma, but for those of us with sugar constantly coursing through our veins, they are a fabulous little chocolate fix.

And get this - they are gluten free! Yeah! And easy! This recipe is a winner all across the board! Go ahead, give them a try. You KNOW you want to. :)

Ooey, Gooey Rocky Road Cookies (isn't that the most perfect name for them?)

Ingredients:
3 cups powdered sugar
2/3 cup unsweetened cocoa powder
1/4 tsp salt
3 large egg whites
1 TBSP vanilla extract
2 cups semi-sweet chocolate chips
2.5 oz toasted sliced almonds
mini marshmallows

1. Preheat oven to 350. Line baking sheet with parchment paper (or use silpat). In a large bowl, sift together the powdered sugar and cocoa powder. Whisk in the salt. Add egg whites and vanilla and whisk until combined. Stir in the chocolate chips and the almonds. 


**How easy is that? No waiting for butter to soften... no need to cream the butter and sugar... no need to get your mixer dirty... lol being impatient about my sweets, this is a perfect recipe for when I'm craving chocolate RIGHT NOW. :)

2. Use a tablespoon to portion cookie dough onto baking sheets. Top with desired number of marshmallows - I used 3-4, next time I'll probably do 5. :) Also, waiting until this point to add the marshmallows keeps them from becoming a transparent, goopy mess. I've used mini marshmallows in another cookie recipe (that I'll have to share later!) and when mixed into the cookie dough, they always just completely melted onto the tray. While they were still totally delicious, they were terribly messy and a pain to clean off of the cookie sheets - this is a MUCH better method!


3. Bake for 10-12 minutes or until the marshmallows are a beautiful golden-brown. Let them set on the cookie sheet for a few minutes before moving to a wire rack to cool. Enjoy them with a cold glass of milk. It'll be heaven!

And THAT is my kind of marketing. :) Surely someone will take me up on such a sweet deal, right?!


Monday, September 24, 2012

The 3 P's of OAMC

So, I started writing a post about the ENTIRE OAMC experience... but decided it was way, way, WAY too long! I mentioned it to Chris, my DH, and he suggested that I break it up into 3 segments. So obvious, right? But he even named them for me! Planning, Prep Work and Process. And the 3 P's of OAMC are born! Thanks, Chris!

Logically, this post is going to be about the first P - Planning. This mostly consists of finding recipes and making a shopping list, with just a couple of other minor details.


Ok, so OAMC is a wonderful concept!

But then you start thinking about all of the little things that have to magically come together to make it a successful experience and it starts to look a little less appealing and a lot more overwhelming....

At least, that's how it was for me. I LOVED the idea, but didn't have the courage to jump right in. I was concerned about the grocery bill. YIKES! I was sure it would be astronomical. I couldn't figure out how I could make it work with a toddler running around and a husband at work. I was hesitant to actually FREEZE my food. Would it really taste as good when I cooked it? And what about recipes? What could I freeze and how should I reheat/cook it?

A lot of these concerns were things that I wouldn't be able to address until I actually got into it, so I researched what a could and decided I'd just go for it!

My favorite part, by FAR, is searching for recipes. :) I will browse recipes forever! I've never sat down and read a cookbook from cover-to-cover, but I've gotten close... A lot of recipes never make the cut. I feel like I'm somewhat adventurous in the kitchen but only to a degree. I know what my family likes and tend to stick with recipes that I know will get eaten. Who wants to waste time and money on a meal that nobody will eat?

That was one of the obstacles I had to tackle with OAMC. There are several great blogs out there about the process but some of them use recipes that my family would never eat... No offense, Mama and Baby love (and all of the other super nutritional bloggers, for that matter), but a lot of your recipes just would not work in my house. I'll do one of those wonderful steamed veggies you can make in the microwave in 5 minutes as an easy side dish, and sometimes I can get them to eat spinach or broccoli hidden in an entree... but that's about it.

I'm always impressed by women who can get their children to eat all 5 veggies everyday... Mine take vitamins. That counts for something, right?

Anyway, for my first go at OAMC I chose a variety of recipes - some for the crockpot, some casseroles, some that you just assembled that day, etc... (I think I'd do ALL crockpot recipes, just for the ease of it, but I only have one crockpot and I do NOT want to have to wash it every single day!). I found some recipes on OAMC websites, but most were my own variation of recipes I knew we liked already, and honestly, I think that's why it worked out so well.

By switching to OAMC I didn't change the way my family eats, just the way that I prepare it and that's EXACTLY what I needed.

Here's a list of the recipes we made at the most recent cook:

Spinach Pesto Manicotti
Cilantro-Lime Chicken
Red Beans & Rice
Lazy Chicken
Fauxtisserie Chicken
Sour Cream and Bacon Chicken
3 Packet Pot Roast
Crockpot Ravioli Casserole
Creamy Turkey Dinner
Teriyaki Chicken
Slow Cooker Fajitas
Cheesy Chicken and Rotini
Pesto Chicken Penne
Lasagna
Honey Sesame Pork Chops
Creamy Chicken and Broccoli

16 total meals. We cooked on August 28, just almost weeks ago, and my family still has 3 meals left in the freezer. So although 16 doesn't sound like that many meals, they always last longer than you anticipate. Eating leftovers or having a pizza night each week really seems to help stretch them out over a looong period of time.

The first time I cooked I made 23 recipes. They lasted us WELL over 2 months. That's just another thing to factor in as you decide to take the plunge. How many meals will you reasonably make each week? How often do you cook now? Do you eat leftovers pretty regularly? Do you have a date night? Oh, and while we had plenty to eat, there really wasn't any room leftover in our small freezer.


Ok, so you've chosen your recipes and now you're ready to start making your shopping list. Something I like to consider in choosing recipes is whether or not certain ingredients overlap - can I save money buying a larger size of a particular ingredient and split it between recipes? Take note of that as you make your list.

Go through each recipe and mark the amounts that you need - the number of cups of shredded cheese, or the number of ounces of a canned good, etc... That will keep you from overbuying at the grocery store and help you to remember if certain ingredients need to be used for multiple recipes.

It also helps if you organize your list in a way that is familiar to you. Personally, I organize it by product location in the store. I start in the back and make my way forward. This way you don't spend all day weaving back and forth through aisles looking for items that you forgot. To each his own, do what works for you! 

As far as saving money... I mentioned before that couponing is not my thing, and I don't pay much attention to sales fliers. On our most recent group cooking day, we attempted to really use weekly specials and various grocery stores to our advantage, but it turned out that the online ad and the store ad were different and we ended up wasting a lot of time driving between 5 separate stores and a lot of money because we got frustrated and just bought the items we were missing at unusually high prices because we did not have the time or patience to go back to the first store.

I realize that my experience is not typical, and I should take it in stride as a learning experience and only look at the in-store ad from now on.... but I'm pretty disillusioned and probably won't exert the effort on that the next time around. However, if you are a bargain shopper and pay attention to that sort of thing, I'm sure you will save TONS of money using those skills for OAMC. Maybe you should start cooking with me and let me benefit from that specialized skill set... ;)

One last thing that you will absolutely need to include on your shopping list is the freezer bags or foil baking pans that you will be needing. And when I say "freezer" bag, I mean it. You want to be able to count on the food lasting all month, and if it's NOT in a freezer bag... well, there's no guarantee. 

Ok, so those are the things to consider as you plan your OAMC cooking day - 


  • Decide how  many recipes you and your family will reasonably use in a month.
  • Choose recipes that your family likes or would be likely to eat.
  • Choose a variety of recipes with different cooking methods.
  • Try to find recipes with similar ingredients - this isn't entirely necessary, but would make shopping somewhat easier and less expensive.
  • Create your shopping list in an organized way that makes sense to you and will keep you from running all over the store.
  • And remember to include your freezing supplies - foil pans, freezer bags, sticky labels (if you'd like), duct tape (to keep ingredients that are added later with the rest of the ingredients, see picture) - when making your shopping list.
This is an example of how to use duct tape with OAMC.

Creamy Chicken and Broccoli is cooked in the crockpot and has a few ingredients that are added in the last half hour of cooking. In order to keep the broccoli and cheese with the recipe, I like to duct tape them together. Really fancy... :)

It does take up a lot of space, but it ensures that you will definitely have your ingredients on hand and where you can find them when it's time to cook.


And THAT is your first P of OAMC.

Pretty straightforward, right?

Friday, September 21, 2012

Old Bananas...

I really like bananas. But apparently I'm the only one in my family. (Chris will eat them but only if they're still really green and bitter. Weird, I know) So I'll buy a few with really great intentions of eating them in an attempt to be healthy.... but I'll eat one, maybe two and then forget about the rest. And then I end up with this:
How frustrating is that? :(
(the one in the back had been in my freezer for about a week...) 

Now I am not one to just throw things away, so I had to come up with another solution. As I was perusing through some lovely bread recipes I came across this recipe and decided it was the perfect opportunity to put these little guys to good use.


Double Chocolate Banana Bread
Ingredients:
1 cup sugar
2 eggs
1/3 cup vegetable oil
1 1/4 cups mashed bananas (about 3) * I didn't even bother mashing them before I threw them in, I let the mixer do all the work... and saved myself from washing another bowl. :)
1 tsp vanilla extract
1 1/2 cups flour
1/2 cup cocoa
1 tsp baking soda
1/2 tsp salt
1 cup chocolate chips (I used semisweet, but I'm thinking next time I'll try white chocolate chips... )

1. Preheat the oven to 350* and coat an 8x4in pan with cooking spray
2. Combine sugar, eggs and oil in a medium bowl. Mix until combined. Add bananas and vanilla and mix well. Add flour, cocoa, baking soda and salt. Mix in at a low speed (you don't want a big mess!). Stir in chocolate chips.
3. Bake for 60-70 minutes or until toothpick inserted in center comes out clean. Let cool in pan for 10 minutes, remove from pan and cool completely on wire rack. Enjoy!


Simple enough, right? And honestly, I'm not the best breadmaker around, but this turned out QUITE nicely! The neighbors enjoyed it and so did I. I had a hard time getting my boys to dig in, though... I guess it's a guy thing. I'm pretty sure you could bake just about anything and as long as there was chocolate involved I would jump in line to give it a try!


The perfect little snack. It's even healthy... kind of. ;)
Just look at those gooey/melty/wonderful chocolate chips! Oh yeah...


Wednesday, September 19, 2012

Lazy Chicken

So I'm kind of curious as to how you will react to this recipe... It could go two very different ways. Either you'll be disappointed because it's so ridiculously simple OR you'll feel like you've hit the jackpot. Either way, I'm just glad you're reading. :)

Lazy Chicken is a recipe I picked up here, at my favorite crockpot recipe destination! This recipe is so amazingly easy and the possibilities really are endless! All you do is throw some chicken in the crockpot (I usually use 2 or 3 big chicken breasts), add a jar/bottle of your favorite sauce and cook on low all day. Then you use two forks to shred it and serve it however your heart desires. In the original recipe she uses chicken and red pasta sauce... as delicious as that probably is, I have never actually done it that way. Our favorite is bbq sauce, but we'll mix it up from time to time using various other bottles of Lawry's sauces or marinades. We probably should give that pasta sauce a try though...

Maybe that doesn't sound that exciting to you, but wait, there's more! :) You could follow those directions and cook it in the crockpot all day... OR you could thaw it and cook it on the grill... OR you could thaw it and bake it. How's THAT for versatile? Not only can you use whatever sauce tickles your fancy, you can cook it pretty much however you want as well! Oh, and then you can serve it in a variety of ways too - over pasta or rice, on a sandwich, by itself, etc....

Like I said before, our favorite is bbq sauce. I'll take it out and let it thaw in the fridge during the day, then Chris will grill it and we'll add some lettuce and tomato and eat it as bbq chicken sandwiches on those delicious 40-minute rolls. Oh yeah! I seriously need to make a couple of these each month...


Lazy Chicken


Ingredients:
2-3 large chicken breasts
1 bottle/jar of your favorite sauce/marinade

To make immediately: place chicken in crockpot, add sauce. Cook on low 6-8 hours. Shred with two forks, serve as desired.

To Freeze: place chicken in gallon-size freezer safe bag, add sauce. Freeze. :)
When ready to prepare, either follow directions above.
OR thaw and grill.
OR thaw and place in 8x8 baking dish. Bake at 350 for 30-ish minutes. I'm not so good with times, just check to make sure it's not pink in the center.

and Voila! Tell me that's not the easiest recipe ever...

Tuesday, September 18, 2012

Cilantro-Lime Chicken

Mexican food is basically a staple in our household. During our first couple of years of marriage, before I really had this cooking thing figured out, we ate fajitas and quesadillas several times a week. I actually kind of miss it - we would make some pretty amazing fajita quesadillas! Maybe we should make some soon...

Anyway, I've found a couple of recipes to incorporate our love of mexican food into our OAMC rotation. They're both equally delicious and they're both made in the crockpot, so the effort is minimal. YAY!

I'll go ahead and share one now, but save the other for later to keep you coming back for more. :) Prepare yourself for some DELICIOUS tacos! 


Yes, there is an excessive amount of salsa on this taco... but that's how I like it! 

Cilantro-Lime Chicken
2 cups prepared Salsa (the beauty of this is that you can choose whatever level of spice you like!)
1 (1.25 oz) package taco seasoning
1 lime
3 TBSP chopped fresh cilantro
3 lbs boneless, skinless chicken breasts

To Prepare for today:
1. Place chicken breasts in the crockpot, combine salsa, taco seasoning and cilantro in a small bowl and pour over chicken. Squeeze lime juice over the mixture. (I usually squeeze out all of the lime juice, then throw the lime halves into the crockpot too, just to add a little extra lime-y flavor.)
2. Cook on high for 4 hours or on low for 6-8 hours. Shred with two forks and serve with tortillas, cheese, sour cream, etc...

To Freeze:
1. Place all ingredients in freezer safe bag. Squeeze lime juice on top, then throw in those empty halves.
2. Cook and serve just as you would in the directions above!

This really is wonderfully juicy and delicious! And so easy too, right? Not very many ingredients, but they all come together beautifully! I always serve it as tacos, but you could definitely serve it over rice too - they're seriously that juicy! Or make some rice and beans and use it for burritos! There are lots of options and I highly doubt that you'll be disappointed with any of them.

The other beautiful part of this recipe is the speed with which it comes together on the day that we do our big cook. All you do is dump the ingredients in the bag and put it in the freezer! So quick and easy! I've been using this in our rotation since my very first try at OAMC and I imagine that won't be changing any time in the foreseeable future!

Monday, September 17, 2012

Easy, yummy bread.

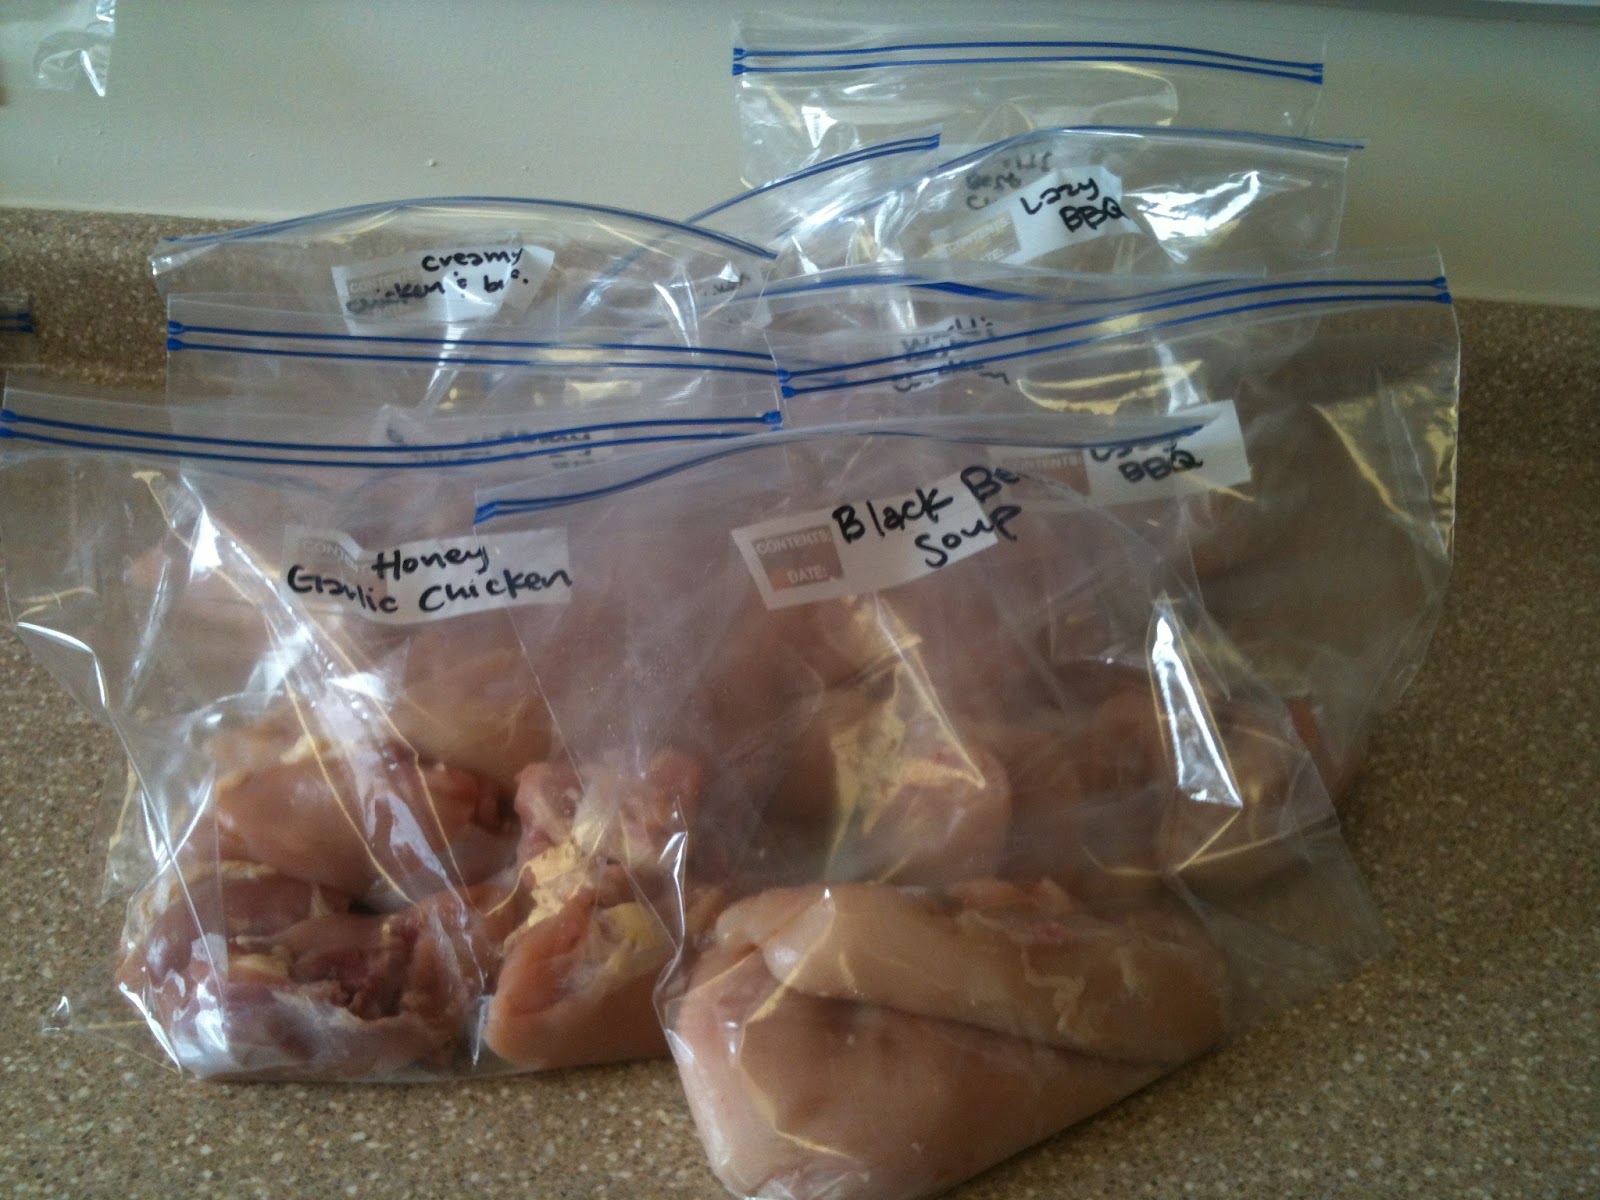
I am a bread enthusiast. I love it. A lot. With OAMC, it's often the only element of our meal that I actually make each day and I have a few different recipes that we rotate through with some regularity. There's one in particular that we come back to a bit more often, but all in all, these are some awesome recipes. Try one or all of them and let me know what you think!

40-minute rolls

40-Minute Hamburger Buns Recipe

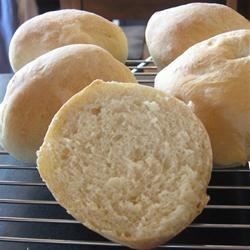
Now these are probably our favorite. As a matter of fact, I woke up to my husband and 2-year-old making them to eat for breakfast this morning. :) Aren't they cute? 


I literally make these at least twice a week and we have no trouble getting through a batch before they start getting stale and rock-like. These are easy and quick and even better than that, they're delicious! I dare you to find an easier/faster/yummier roll recipe... :) 

Ingredients:
2 TBSP Active Dry Yeast
1 cup plus 2 TBSP warm water
1/3 cup vegetable oil
1/4 cup sugar (Chris likes it when I add a little bit more...)
1 egg
1 tsp salt
3 - 3 1/2 cups flour

1. Dissolve yeast in warm water. Add oil and sugar. Let sit 5 minutes. Add the egg, salt and enough flour to make a soft dough.

2. Turn onto floured surface. Knead until smooth and elastic (3-5 minutes). Divide into rolls - the original recipe says to make 12, but we usually make between 16 and 20. Place on greased baking sheet, cover and let stand 10 minutes.

3. Meanwhile, preheat oven to 425*. Bake for 8-10 minutes or until lightly golden-brown. 


No-Knead bread

No Knead Bread Recipe

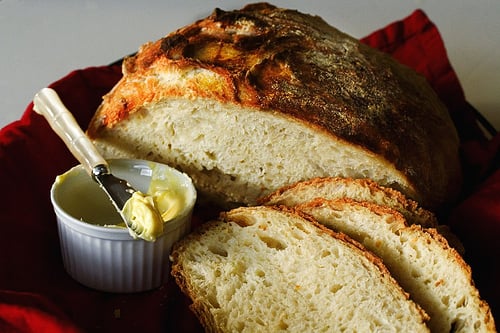
Oh man, is this stuff good! It's pretty simple, it only requires 4 ingredients - and one of those is water so I don't even know if that counts... and as the name suggests, you don't have to knead it. Woohoo! 

The only problem is that you really have to plan ahead. From start to finish the process takes from about 15 to 23 hours. Yeah, basically forever when you're waiting for some delicious, warm and fluffy bread... I accidentally stumbled upon this recipe when I was looking for a quick recipe to make with dinner one night. I got started before reading the FULL recipe and ended up being really disappointed to find out that I wouldn't be able to enjoy it until the next day. :( Where was that 40-minute roll recipe when I needed it?!

Obviously it was totally and completely worth the wait and that is why I'm passing it along now. Get this started for tomorrow night's dinner right after you make the 40-minute rolls to eat with dinner tonight. :) I promise you'll be glad you did!

Ingredients:

3 cups bread flour
1/4 teaspoon instant yeast
1 teaspoon fine table salt (or 3/4 tablespoon of kosher salt)
1 1/2 cups warm water
Covered pot (five-quart or larger cast iron, Pyrex, ceramic, enamel...something that can go into a 450F oven.)
 1. Mix dough: The night before, combine all ingredients in a big bowl with a wooden spoon until the dough just comes together. It will be a shaggy, doughy mess. Cover with plastic wrap and let sit 12-20 hours on countertop.
2. Shape & preheat: The dough will now be wet, sticky and bubbly. With a wet spatula, dump the dough on a floured surface. Fold ends of dough over a few times with the spatula and nudge it into a ball shape. You can use your hands if you like, just keep your hands wet so that the dough does not stick. Generously dust a cotton towel (not terrycloth) with flour. Set dough seam side down on top of towel. Fold towel over the dough. Let it nap for 2 hours. When you've got about a half hour left, slip your covered pot into the oven and preheat to 450F.
3. Bake: Your dough should have doubled in size. Remove pot from oven. Holding towel, turn over and dump wobbly dough into pot, using your hands to get the dough off the towel. Doesn't matter which way it lands. Shake to even dough out. Cover. Bake 30 minutes. Uncover, bake another 15-20 minutes or until the crust is beautifully golden and middle of loaf is 210F. Remove and let cool on wired rack. If not eating right away, you can re-crisp crust in 350F oven for 10 minutes.


Bread Machine Rolls


Now these ones were our go-to bread recipe for a LOOONG time. Like for years, I think... They're light and fluffy and you can eat like 6 without even realizing it! We still love them, just not quite as much as the 40-minute rolls. 
I think the prep time plays a big role in that...

These are pretty simple because you just throw the ingredients in your bread maker and let it do all the work. Then you shape them, let them rise, and throw them in the oven. Really not bad, but it still takes like 2 1/2 hours versus the 40 minutes that the other ones take.

My personal favorite perk about these ones would be their freezer capabilities. I was in charge of bringing the rolls for Thanksgiving last year and there were a LOT of people coming. I knew I wanted to use this recipe, but the bread machine can only make so many rolls at a single time. SO... the week of Thanksgiving I made a batch a day. I'd put them in the bread machine and let it do it's thing, then shaped the dough into rolls. Rather than letting them rise, I placed the little dough balls on a baking sheet and set that in the freezer. Once they were completely frozen, I popped them in a freezer bag. On Thanksgiving day I pulled out my now very full bag of dough balls and placed each ball on cookie sheets to rise (just like the recipe says). It worked like a charm! 

So, for those of you interested in bread recipes to use with your OAMC lists, this would be an excellent candidate! Enjoy!

Ingredients:
3 cups bread flour
3 tablespoons white sugar
1 teaspoon salt
1 cup warm milk
2 tablespoons butter, softened
1 (.25 ounce or 2 1/4 tsp) package active dry yeast
1 egg white
2 tablespoons water
1. Place the bread flour, sugar, salt, milk powder, water, butter, and yeast in the pan of the bread machine in the order recommended by the manufacturer. Set on Dough cycle; press Start.

2. Remove risen dough from the machine, deflate, and turn out onto a lightly floured surface. Divide the dough into twelve equal pieces, and form into rounds. Place the rounds on lightly greased baking sheets.** Cover the rolls with a damp cloth, and let rise until doubled in volume, about 40 minutes. Meanwhile, preheat oven to 350 degrees F (175 degrees C).

3. In a small bowl, mix together the egg white and 2 tablespoons water; brush lightly onto the rolls. Bake in the preheated oven for 15 minutes, or until the rolls 

** This would be the point where you'd freeze them! Then follow the rest of the directions when you decide to bake them!


Italian Bread


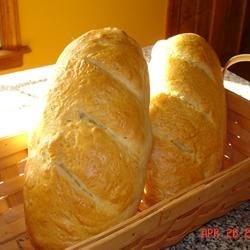
This recipe is also for use with your bread machine. It too takes about 2 1/2 hours from start to finish. We like this one a lot, but don't make it very often. It's great when served with Italian dishes. I made it last night to go along with our OAMC lasagna and it was perfect! Nice and dense with a crispy crust, it was a great vehicle to carry that tangy tomato sauce from my plate to my mouth. :) I think I may go eat leftovers right this second...

Ingredients:

4 cups all-purpose flour
1 tablespoon light brown sugar
1 1/3 cups warm watter
1 ½ teaspoons salt
1 ½ teaspoons olive oil
1 (.25 oz) package active dry yeast
1 egg
1 tablespoon water
2 tablespoons cornmeal

1. Place flour, brown sugar, warm water, salt, olive oil and yeast in the pan of the bread machine in the order recommended by the manufacturer. Select dough cycle; press start.

2. Deflate the dough and turn it out onto a lightly floured surface. Form dough into two loaves. Place the loaves seam side down on a cutting board generously sprinkled with cornmeal. Cover the loaves with a damp cloth and let rise, until doubled in volume, about 40 minutes. Meanwhile, preheat oven to 375*F.

3. In a small bowl, beat together egg and 1 tablespoon water. Brush the risen loaves with egg mixture. Make a single long, quick cut down the center of the loaves with a sharp knife. Gently shake the cutting board to make sure that the loaves are not sticking. If they stick, use a spatula or pastry knife to loosen. Slide the loaves onto a baking sheet with one quick but careful motion.

4. Bake in preheated oven for 30-35 minutes, or until loaves sounds hollow when tapped on the bottom.


Well there you have it! Surely you'll be able to put one of these beauties to work this week! :) Let me know what you think!